

A few of you asked for a tutorial of the card I made for the 100th challenge at FSC (here) .
Put together a short step by step which might help you make the above card, more pics below
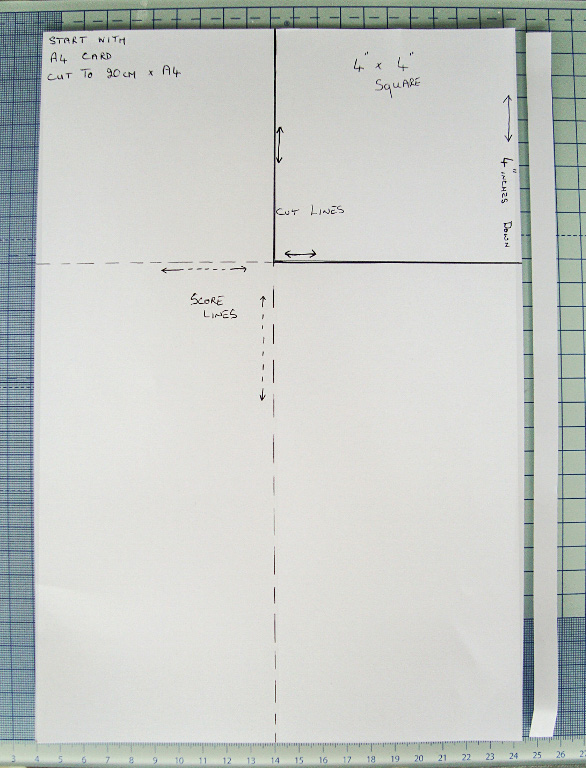
The first two pics are a copy paper template for you to try out yourself. Sorry girls please notice that I work in – inches and centimeters (I use whichever works best for what I am making).
1st Pic – Shows the little strip that I cut from the end plus the measurements. Also showing where the cut lines and fold lines should be.
2nd Pic – This is how your card should look when the corner has been cut off and the score lines added.
Also I have marked where you fold over and glue – #2 onto #1.
#3 is your flap over piece.
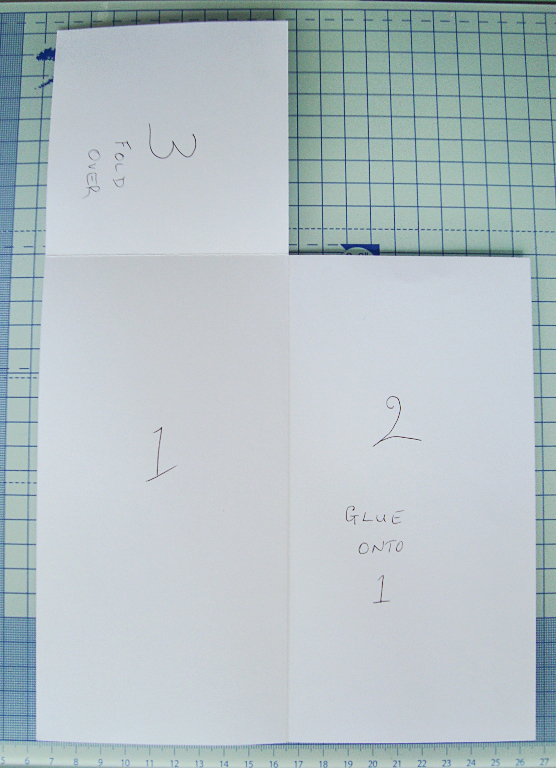
This is how the card should look when glued and folded. The front flap over should measure 4″ x 4″.

Now for the next part.
First Pic – These are your insides and I usually make three but you can do as many as you like or less.
The measurements are 19.5cm x 10cm with a 1/2 inch score line at the beginning.
2nd Pic – Use glue or tape only onto the 1/2 inch strip then place onto the card making sure you butt up to the very edge of the 4 inch line.
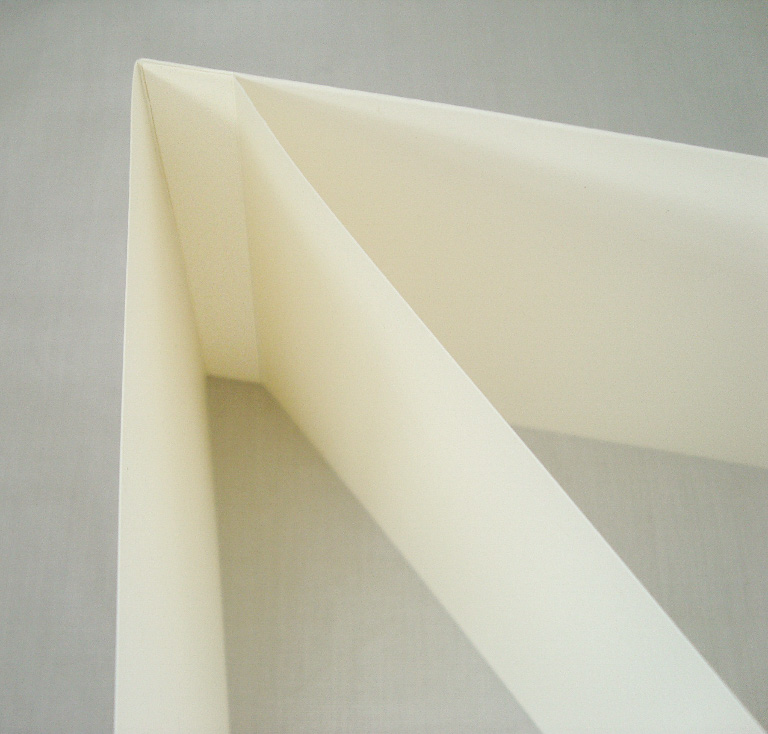
3rd Pic – As you can see this is how you get start to get your cascading make.
I usually decorate and decide how long or short my next pieces are before gluing and putting everything together.


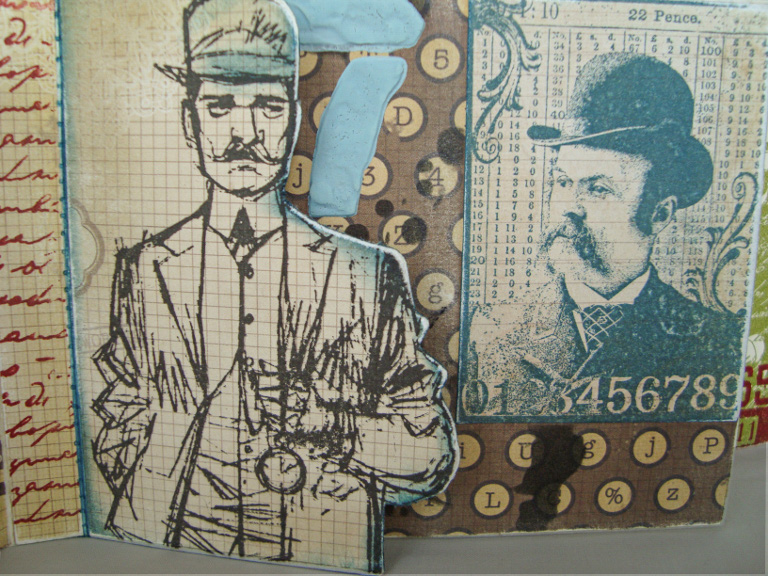
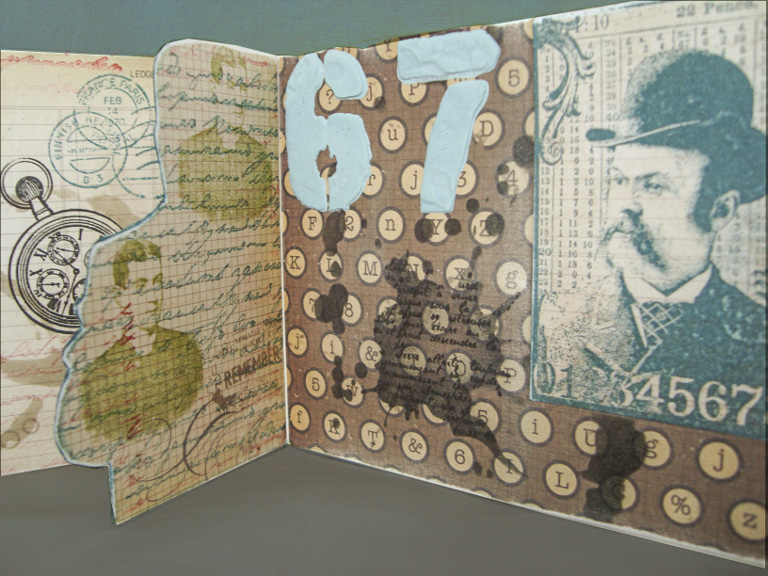
As you can see from the 2nd pic below I have stamped the man’s image then cut around him to give the flaps more dimension.
This is how it should look when on the mantlepiece. This card has only three inserts but it looks equally as nice. These cards will fit into a DL envelope perfectly.


Oh thank you very much Shirl for this great step-by-step, and all the useful measurements for this super card!!! I didn’t ask, but Im very happy with it! 😀 I will keep the link and link on your blog of course if I do one on this model. Hugs, Coco xxx
Another awesome cascading card Shirl, thanks for the tutorial, looking forward to having a go at making one for myself.
I xx
Brilliant instructions Shirl! And I’m the same with measurements I take whichever has the rounder number to work with!
Gorgeous stamping too on this cascade.
A super step by step Shirley and another fantastic card.
Yvonne xx
Shirl, I’ve just realised I missed a couple of your gorgeously creative makes so sorry for my lack of comments on those as they’re so beautiful.
Thanks for sharing how you made the shape of your wonderful glamour and glitz creation too and this one is absolutely fabulous!
Fliss xx
A wonderful step by step Shirl, thanks so much for sharing! Hugs, Anne xx
Hi, Shirley! Wonderful cascading card tutorial. I have not seen one before, and yours is fabulous! It’s really great with the masculine theme, too. I’m sorry about not visiting as often as I’d like these days. Thanks for understanding. hugs, de
Been away and now I am back to check out your awesomeness! Your designs are always such a treat! I love the cascading effect and what a fabulous masculine card! Love the design, Shirley! Hugs!
Thanks for the step by step pics Shirley, Can’t wait to have a go.
I love this masculine version, a great way to showcase the images and extra stamping.
Hugs, Avril xx