Log in |

Archive for the ‘Album’ Category

Thank You Sandra and Shirley

A huge thank you to Sandra and Shirley for mailing to let me know that there was a problem with the commenting on my blog.

All sorted now (I hope) and again thanks to you both.

Whilst giving the ‘Craft Cranny’ a tidy up I came across this Shabby Chic styled book that I gave a class on with my Saturday girls last year but never blogged.

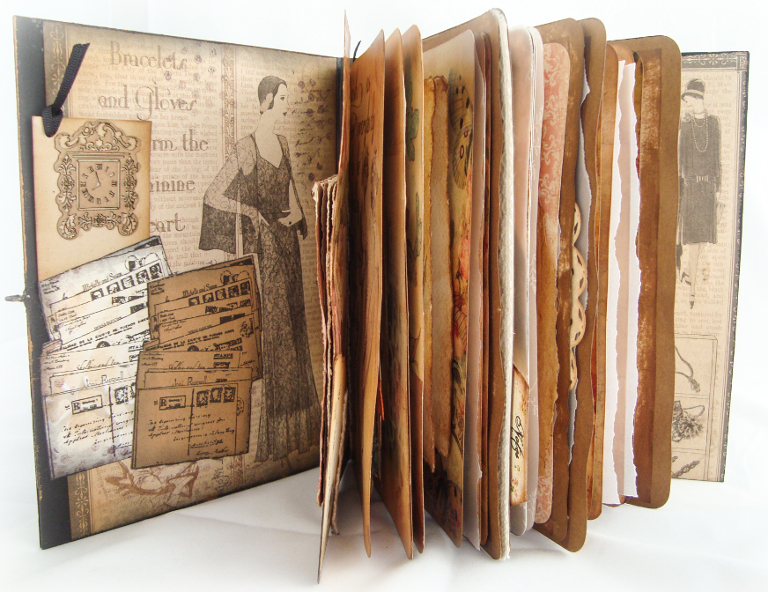
It has separate signatures, so when opened it lays flat.  You can make this style of book with as many papers and signatures as you want.

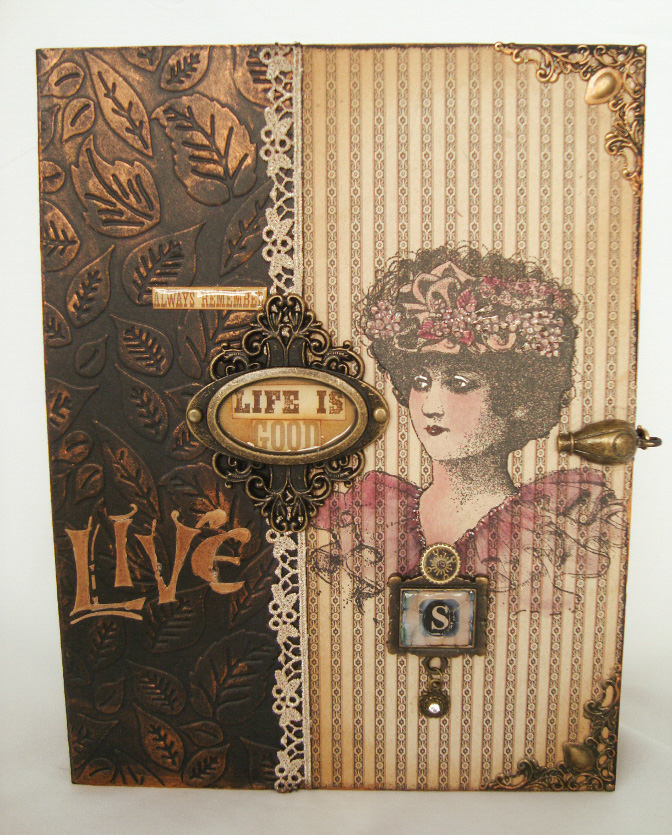
Here is a larger Shabby Chic styled Junk Journal which I made in a similar way.


The cotton running stitches on the sides show that there are four signatures in this book.

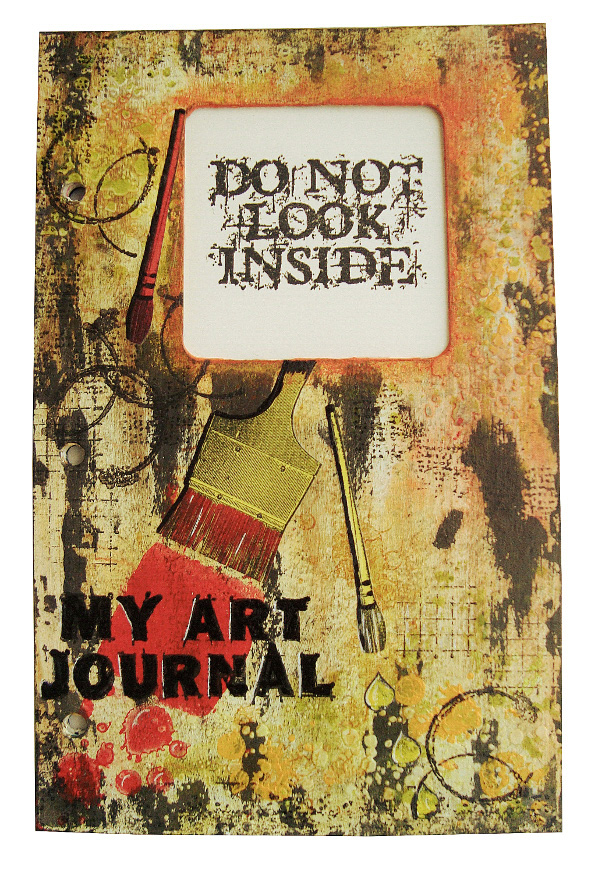
Front cover is made of material with ‘Heat n Bond’ fused to the back.  This makes it rigid, almost feels like cardstock.

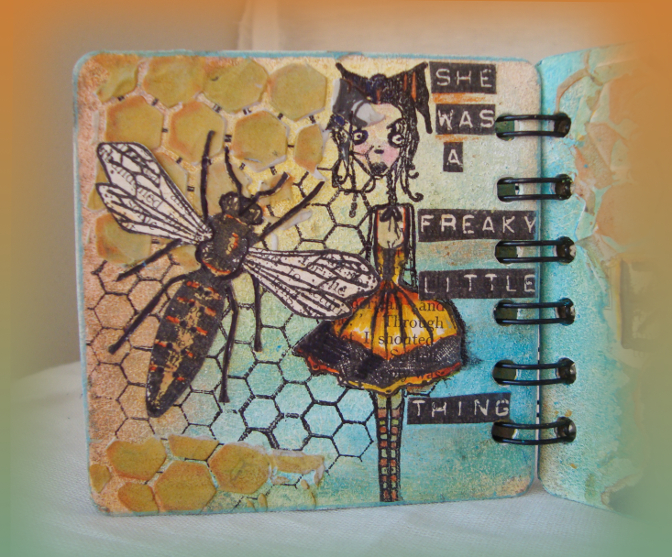
Then the fun part begins, throw whatever you like at it.

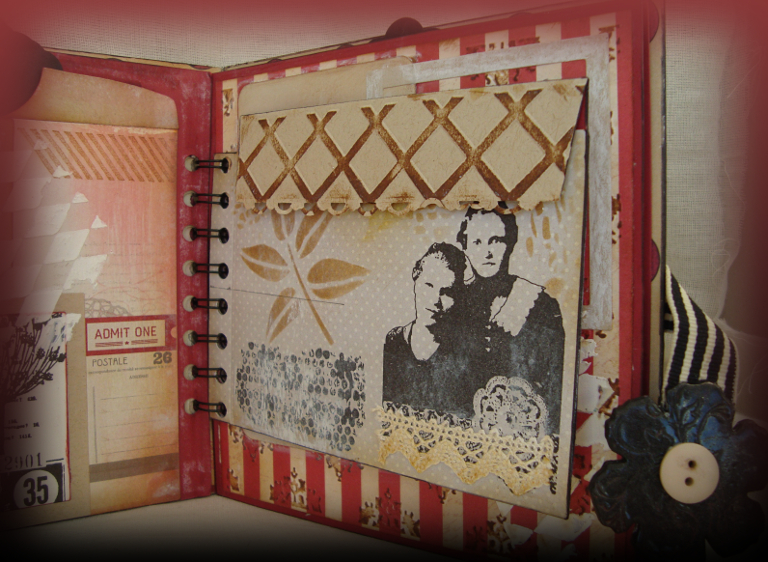
Gesso was randomly painted all over, then came modelling paste through a stencil, next was pretty pieces of lace and netting which surrounded the image before lastly adding more Gesso.


Here comes the excessive quantity of photos lol.

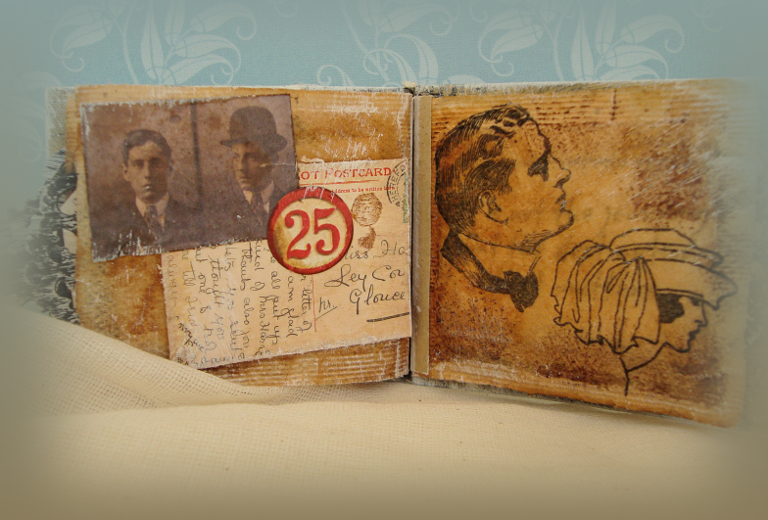
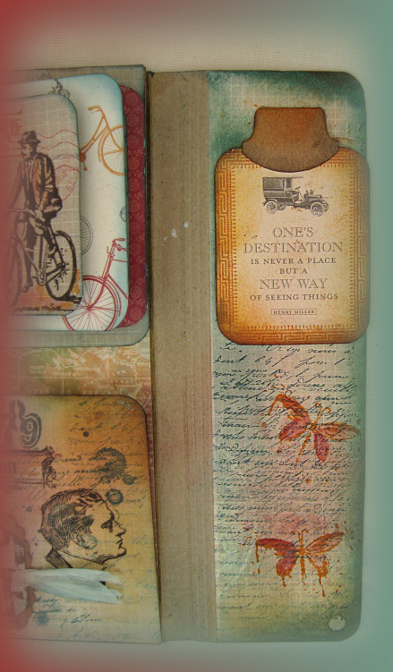
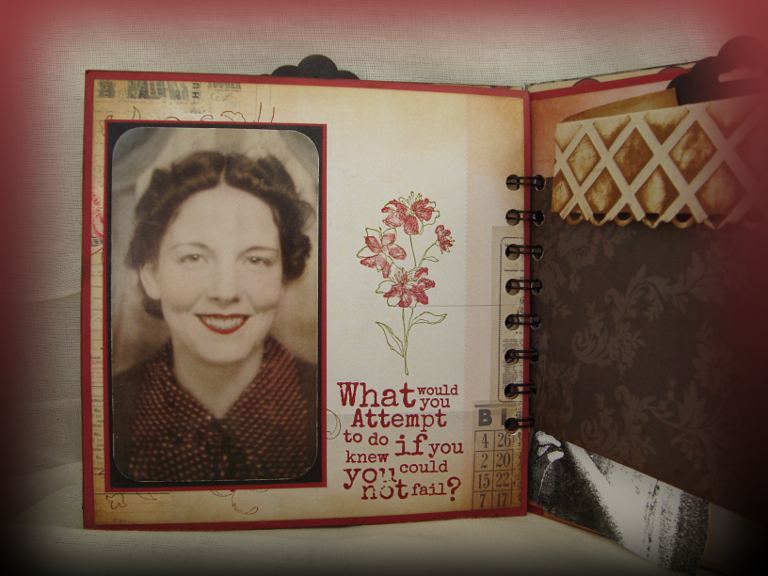
First pic has such a beautiful image on the left which was done using the Image Transfer Technique.  Not the one where you leave to dry then wet and rub off with your fingers, oh no, tooooo messy.

The method used here is where you adhere it with glue, then smooth flat with a credit card before peeling off gently.  This leaves more of a shabby, distressed look but is not so time consuming as the other way.

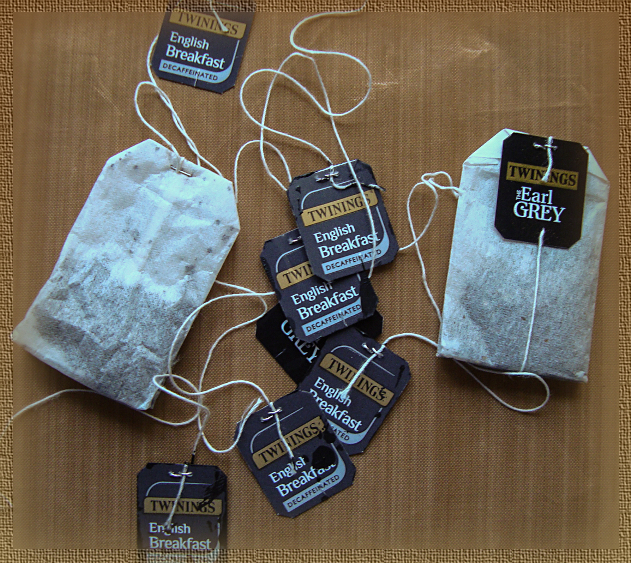
Most of the the papers in this book were dyed by myself with coffee.

Try to make a day of it when dying papers because nothing is safe from the wet coffee mixture.

Before drying the papers in the oven place a doily on top of the wet paper then dry.  Below is how the papers look, cool eh!!!

When finished place everything in a plastic container ready for another day’s crafting.

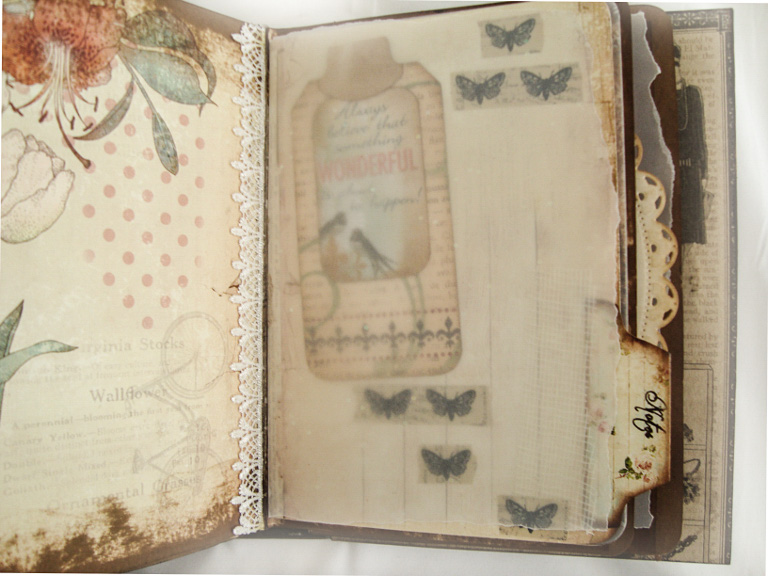
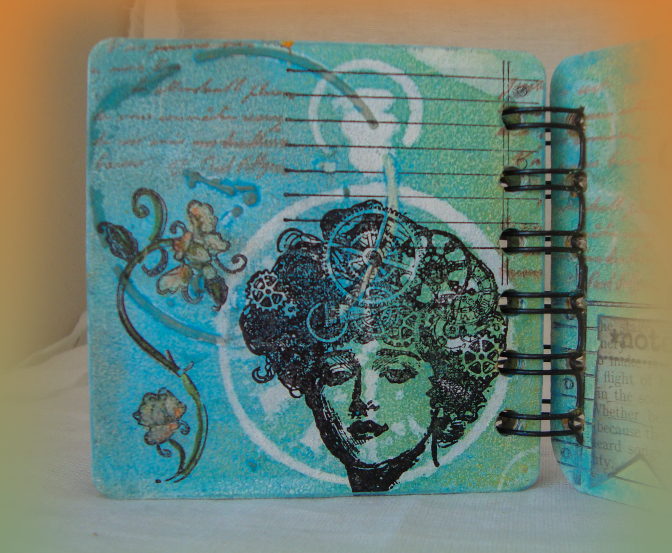
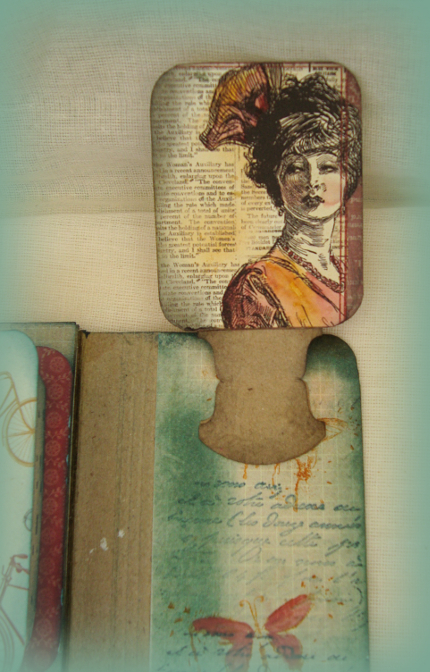
 Again this first pic of a very austere but regal lady was done by image transfer.  Bird and numbers were stencilled onto coffee dyed paper.

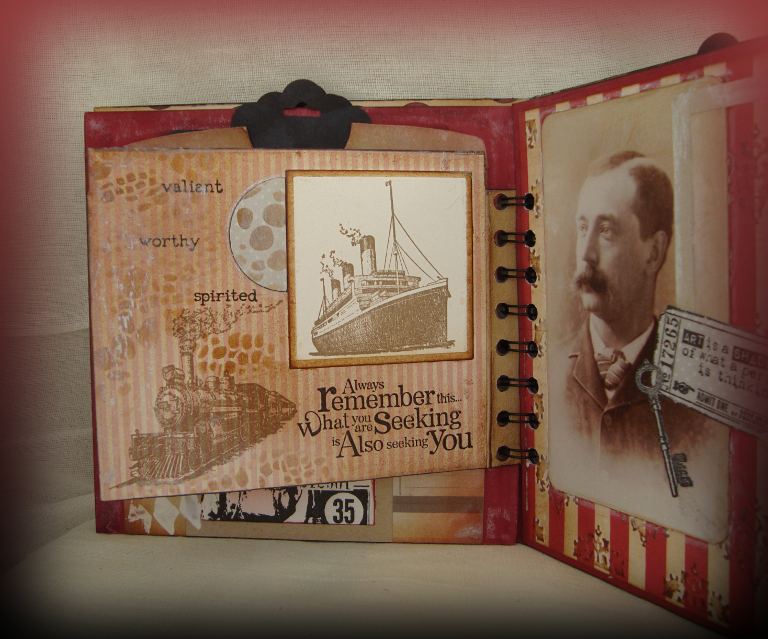
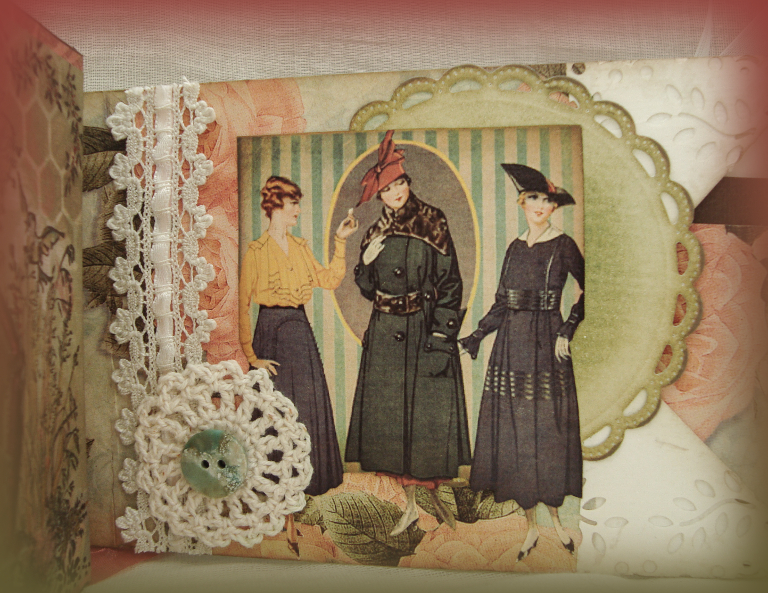
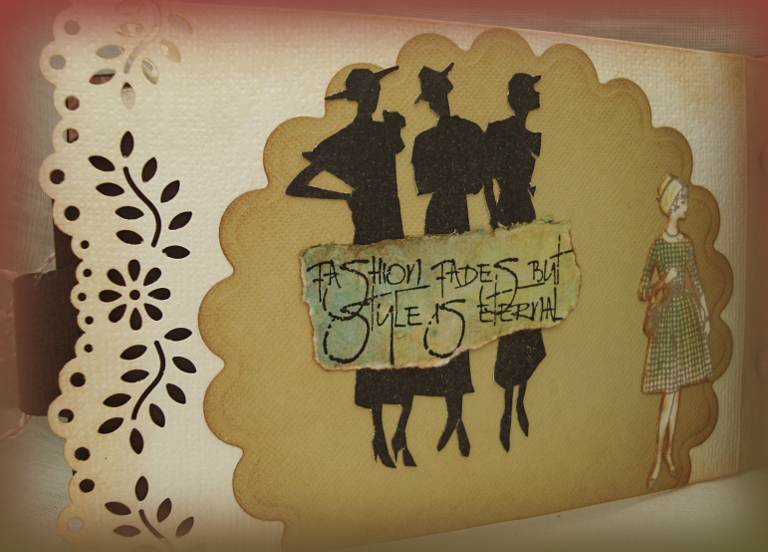
Created lots of pockets for tags plus most pages have stamping on them.

Nearly all the tags going into the pockets are from G45 and you can just see hints of washi tape used for decoration.

 Shirl

Contour Change A Page Book

FSC is all about Autumnal Colours this month which the lovely Esther picked as the theme.

I opted not to go for an Autumnal make but just to use the Autumn colours.

Ordered some really fab Seth Apter goodies before I went on my hols and they have been sitting on my desk crying out to be used.

The album below has been made with the Contour Change A Page Die.  What it does is cut out the pages to make an album of your choice.

For the front of the book I used a range of Autumnal colours and inside there are lots of die cut pages, in various types of cardstock, just waiting to be journalled.  Left the rings off to make it easier to take photos.

art-journal

Paint brushes stamps from Anna Griffin, raindrops  Designs By Ryn the quote from PaperArtsy,  and not forgetting Studio 490 Art Journal Basics.

All other background stamps are from Stampin Up called Timeless Textures.

A Tim Holtz stencil, Speckles was used with molding paste just to add a little texture here and there.

Black Versafine ink was used for some of the stamps and paint was used for the rest.

Entering into the Craft Stamper Challenge which is Anything Goes.

I would love it if you hopped on over to see all the DT’s work as they are simply stunning.  Also don’t forget that the winner of this challenge has $20 to choose anything they like from Flonz’s store.

Shirl

More Junk

Sharing a few more pages with you from my junk journal.  I say a few because there are loads in the book and I love everyone of them.  Also loads of flippy flappy smaller pages with lots of yummy ripping and tearing on the edges.

The first page has a pocket which houses a little mini junk journal notebook.  (My first attempt at a junk journal, wanted to see if I liked making it.)  When removed it shows off a gorgeous page with two very pretty ladies.

128

 The first pic shows a ripped vellum pocket for a sideways tag.  Next pic shows off the tag when taken out.  Turn the page and you can see the vellum pocket from the other side.

345

I have loads of vellum in my stash which I very rarely use now.  This is a great way of using it as I made vellum page dividers, very tactile and delicate looking.

There are, as I have said, loads of pages but I think this is enough for now.

67

Junk Journal

Sharing some of my Junk Journal with you today which Irene and I started whilst facetiming last week.

Stumbled across these Journals whilst mooching on Youtube.  Didn’t follow any particular video – just got some ideas.  So if you want to make your own just type in Junk Journal and have a mooch.  The book so far has three signature sections which were hand sewn into place and I am toying with putting in a fourth.  Just about anything goes with these books

1

Already there are lots of pages and I want to add more elements so the fastening to shut the book had to be flexible to be able to do this.

Decided on an old necklace clasp which was lurking in the depths of my bit drawers which worked really well.

23

Close up of the clasp shows how robust it is and also the showing of the inside pages.

Lots more pages to follow showing the vellum, tags, lace, parchment paper,  doilies and loads of other materials used.

45

Shirl

Beer Mat Album

Didn’t realise how long ago it was that I last made a Beer Mat Album, over 2 years ago.  My last one which you can see here was a Beer Mat Brag book,  coincidentally it was also for another FSC New Year challenge … da da da da – spooky!!!

Fashionable Stamping Challenges starts off the New Year with a theme of  “Something New” which was picked by my fabby teamie sister Esther.  This could be new stash, new technique or even a new resolution which you may have made (and already broken lol)!!!!

Still on a roll with my new Gelatos but this time I have used them to cover the beer mats.  Aged the frame with a sprinkling of different distressed embossing powders before adding the image.  The corrugated background was coloured with Gelatos.

Not going to bore you too much about how it was made because time is such a precious thing to us all.

“A Picture Is Worth A Thousand Words”

Hopefully my pics tell a story just as well as a large amount of descriptive text.

1234

One thing which I will tell you is that Gelatos seem to work better with a primed surface, Gesso being my preferred medium of choice.

(Irene told me the tip about the Gesso.)

I have used a mixture of new and old stamps, dies and even some new masks which gives a different feel to each page.

56

Last page of the ‘Beer Mini’ which uses one of my new Christmas stamps, isn’t she just divine?

7

I would love it if you hopped on over to see all the DT’s work as they are simply stunning.  Also don’t forget that the winner of this challenge has $20 to choose anything they like from Flonz’s store.

Shirl

Flimsy & Delicate But Very Beautiful

If it wasn’t for Andrew, the making of this flimsy and very delicate teensy weensy ‘Tea Bag Book’ could not have been possible.  Not being typically English of me but I have never formed a relationship with tea.  (Really can’t stand the stuff.)  I’m a REAL coffee drinker kinda gal, black and no sugar but if out for coffee and cake with friends then it’s a large LATTE with Starbucks being my fave.  None of your ole instant for this baby.

 Fashionable Stamping Challenges this fortnight have a theme of  “Heat It Up” which was picked by the lovely ‘Mrs B … as you know it’s Avril to you and me.

She looks really fed up but  I love this image which is why I decided to add her to the front of the album.  Left the back rather plain as there is so much going on elsewhere.

Andrew probably only drinks one cup of tea a day, so collecting used tea bags has been a struggle for me … he forgets to keep the used bag!!!!  Finally managed to dry out a few so this little book could see the light of day.

1st pic shows the used t-bags (dried) but with the tea emptied out.  2nd, details the stamping and embossing.  3rd, is where I have added an extra piece of paper onto the edge of the bags.  Because of the flimsiness of the bags I had to find something which wasn’t very heavy and a light manilla envelope was perfect for this.  Also distressed over with DI Vintage Photo.  4th, the reverse side of the bag where I have collaged some tiny images mainly from one of Tim Holtz collections.

1234

1st pic shows some unused t-bags which I wanted to alter into little tags that fitted inside the square t-bags.  I had to open each bag individually, pour out the tea then flatten ready to make the tags.  2nd is the made up tags which had some stamped card fitted inside.  How this was done was to stamp and emboss some sentiments and quotes onto the card then these were placed inside the white tissue-like paper bag.  Again because it is only like a tissue paper you have to work very carefully with the materials.  Sealed the end with a Spellbinders cut down tag die .

65

More and more pics, this time with the album put together and displayed in all it’s glory.

78910

Just about near the end of the photo showing and I really hope you enjoy looking at this album as much as I enjoyed making.

111213

Shirl

File Folder Playtime Take 2

Battery all charged and Mr camera was just raring to go on this little beauty – loads of yummy photos.

Check here to see the first post about how the file folder came about.  Ready ….. well lets get started!!!!

The whole thing when opened with lots of flippy flappy things going on.  Loads of space for photos to be added and with too many stamps and techniques used for me to mention but I am sure you will know many of them.

Onto the close ups.  First pic is the inside flap which could go either on the outside or inside, your choice.  Next is of the flap opened with a little tag that when flipped up shows off a real fabby picture of me … I know – wishful thinking!!!

Inside FolderInside Folder 1Inside Folder 2

These pics show the flaps closed then whats underneath when opened.  Sorry for the milky look of the window but that’s the acetate reflecting off the camera.

Inside Folder 4Inside Folder 6Inside Folder 3Inside Folder 5

Nearly finished thanks for your patience in scrolling down to have a look hope you have enjoyed perusing as much as I did making x x

Inside Folder 9Inside Folder 10

My next Skype session with Irene is Wednesday … when we will be making ……. well, let’s wait and see  😉

Shirl


File Folder Playtime

Our Skype playtime this week (Irene and myself) was making this file folder.  You will soon be able to see Irene’s makes because I am pleased to say she is going to start blogging again.

Now I have seen these folders around blogland but this is a first for me.  It was I’s choice of what to make this week and this was it.  Soooo pleased with how it turned out.  Absolutely oodles of yummy inking and stamping plus oodles more artwork on the inside.  Elastic was needed and all I had was a white with an orange zigzag pattern so what’s a girl gonna do when she’s too impatient to wait and buy more … colour with a contrasting ink, that’s what.  It didn’t look too bad in the end.

Just typical … as I am on a roll to take more pics the battery runs out!!!! grrrrrr.

File Folder2File Folder1

Our First Skype Session

Been on at my SIL for sooooo long that I had given up that it was ever going to happen but yayyyyy it has and long may it last.  She finally got a web cam!!!!!!!

What a day my SIL Irene and I had two weeks ago.  We had our very first  ‘Crafty Skype Day’  and what a day it was.  We started at 10 in the morning and finished at 4 in the afternoon.  We didn’t want to either but we both thought that maybe we should start making the dinner for the other halves.  Below is what we made.  Well this is what I made and it won’t be long before you can see what Irene’s looks like because I am pleased to say she is going to be back blogging again soon.

So much fun was had that we are doing it each week.  You should see what we made this week it’s just gorgeous.  A bit more scruffy and distressed than the make below.

It’s just like having Irene in the room with me.  We trot off to have a coffee, then eat our lunch … maybe hang out some washing all in between our crafting.  Irene is a fabulous crafter but she lacks the confidence to use all her crafty stash and that’s just what I make her do.

Showing front and back of the album first with loads of scrummy stamping.  I used the Cinch to bind mine and Irene used the Bind-It-All plus my colours are mainly black, red and brown whereas hers are more purply, I think.  So long ago I’ve been asleep since then.

Used a couple of Tim Holtz pics for inside but changed the lady as she didn’t match the page opposite.  I whitened all of one side which turned out just right.

The flowered page is the back of a SU envelope with a SU stamped white embossed flower before colouring in with a white chalk pen also from Stampin Up.

456

Thought I would add a male page with the yummy new stamps from SU called Traveler.

78910

Loads more pages but I think you have seen enough for one day.

Watch out for more projects because as I said this is a weekly Skype Craft Day.

Shirl

An Anything Goes Album For VSC

Vintage Stamping Challenges has an Anything Goes challenge theme this month.  This is my DT piece for the challenge an anything you want to put in it album.

Made this a few months ago but only just finished because I had trouble getting wooden beads for it.  A very good friend called Maria gave me a packet at my class last week.  Thank you Maria x x

Another reason why it was never finished was because I didn’t have any matching ribbon to thread the beads through.  Whilst on holiday I took the album with me to see if I could match some ribbon.  A fabulous lady called Sue from Stampy Sue gave me some ribbon which matched everything perfectly.  Thanks Sue x x

Should really call this my freebie album!!!

The beads are threaded through the ribbon and used as separators, this way you can add very dimensional elements.  The stamps on the front are from Inkadinkadoo called Bottle Row.

When Dot and I Skype we show each other our makes and she loved the stamps used on this album.  So I told her where I bought them and she got some as well.  Forgot to take a photo of the side because I used the single bottle but you can see what it looks like by seeing what Dot has made with it here.

Love making albums because I can use so many techniques and add them to each page.  The little birdcage die was triple embossed with red embossing powder then some silver guilding wax added.  The same page had loads of stamping, colouring, inking and stencilling added to it.  You can just see the beads on the side of the pic.

Flowers1Flowers2Flowers3Flowers4

On the second pic below the image of the whispering ladies was printed onto tissue paper and added with Mod Podge.  The last page has two stamped images from Flonzcrafts which you can find here.  There are three large tags inserted into the side edges of the pages.

Flowers5Flowers6Flowers7Flowers8

To enter this months challenge just click Mr Linky at the bottom of the VSC web page and maybe it could be you who wins the $20 from Flonz’s store. Please visit the DT’s blogs for more inspiration and also it would be nice to leave them some love.

Shirl