Log in |

Quick And Easy Scenic Card

FSC is all about TREES this month which the lovely Sandra picked as the theme.

Isn’t it strange that over the years the things that you used to do a lot of gets pushed to the back of your mind as you develop other tastes in crafting.

Making a scene with stamps and inks was something I so loved doing years back when I first started crafting but other things like paints, molding paste, crackle and messiness seem to have taken over.

So this is why I enjoyed making my little scene below, which was so quick and easy, enjoyed every minute of the making and revisiting some of the old techniques which I used to do.  This literally took minutes and yet it looks so very elegant and fresh.

Just shows what you can make with a 6 x 6 white card, three stamps and two colours of ink.

7

The embossing folder used was an Xcut 6 x 6 square frame, tree stamps are from Stampin Up and the little birdie … who knows it’s that old.  The little grass is also an old Art Impression wooden stamp.  You can find the cling mounted set here but I think the wooden set has been discontinued.

I would love it if you hopped on over to see all the DT’s work as they are simply stunning.  Also don’t forget that the winner of this challenge has $20 to choose anything they like from Flonz’s store.

Shirl

Bon Voyage Paloma

This is a very special post today, it’s all about the lovely Lys who started Paloma’s Peace Chain Journey around the world.

If you have not heard about dear Paloma then I urge you to go see all about how her journey started and who she has visited.

When I came back from my hols (we were away for nearly a month) there was a very large parcel sitting on my doormat.  Could not for the life of me think what I had ordered before I went away.

What an utter delight awaited me when I opened the parcel.  Dearest Corinne had sent Paloma on to me with an abundance of goodies in tow.

Poor little might must have flapped her wings like crazy, all the way from France to Wexford in Ireland.

She has made two very dear friends here in Ireland,  at first they were not so sure about her, but now that Paloma is winging her way across the Irish waters to another land they are very sad.

Her first newest friend is Penny, they bonded with each other from the very start.

We all need friendship and peace but sadly we do not see enough of it in the world today.
So what better way to showcase our dear little dove than with Man’s Best Friend?

dsc08166_edited

She was very good whilst here and she shared herself around equally with the fur babies.

Byron actually was the gentlest with her and very protective, Penny wanted to play all the time.

12

I do hope that the photos above show how with a little bit of love, gentleness and kindness we could all live in a better world.

Palmona is just about to fly away to another chapter in her journey around the world to spread the word about peace and love.

Sadly not everyone can have this beautiful and tranquil scene from their garden but each and everyone of us can carry beauty and love in our hearts.

Farewell little one you have a long journey ahead of you across the Irish sea to another country but I am sure your message of love and peace flies with you.

4

Bon Voyage Paloma.

Shirl

Some Pebeo Paints Now Hanging On My Wall

Bought some Pebeo products when Sheena was on C & C but like most of my new stash they languished in a box until I was in the mood to use them.

Before I went on holiday back in July I finished these two canvases and because hubby Andrew loved them so much they were hung on the wall.

2

Paints used were Pebeo Iridescent Green Yellow, Iridescent Blue Green and Iridescent Green Blue.

Also used a Pebeo Mixtion Relief, Metal Gold Leaf Flakes and Prisme Fantasy Turquoise.

3

They both hang side by side on a plain cream wall.

1

Shirl

Two Very Different Canvases

Another make completed from the unfinished box … although there’s a long way to go until I get to see the bottom.
Before I show the completed piece here’s why it went into the unfinished pile.

To all intense and purposes the canvas was finished whilst on holiday in Cork with Crafty Friend but when I came home I felt something was missing.  At the time just totally in the dark as to what it was hence relegation to the:

“Get Around To It Someday Box”.

Since having a good ole rummage through the box I came across the canvas again and hey presto I knew immediately what was wrong with it.

No focal point to draw the eye.  Simple really!!!!  Just needed a fresh pair of peepers.

Both images lay embedded onto the canvas and nothing popped out at me.

That’s when I added a frame and some wording.  The frame was cut from a very old Spellbinders die.  Chalk paint used was Cosmic Shimmer Heritage Green and Cadet Blue.  Finished by hi-lighting with an Americana paint called French Vanilla then randomly used a script stamp.

Previously both images looked very flat on the page but by adding a frame around one and a bit of gesso sponging it made them both stand out in their own right.

1_edited_edited

Images from Pion design ‘Grandmas School Book‘.

This would look great in a child’s bedroom.

******************************

Showing the second make which didn’t get finished whilst in Cork, but I knew where it was going, so completed very quickly when I got home.

It has already been posted – below is a pick which if you click on will take you to the post in case you didn’t see it first time round.

1

Shirl

Saturday Classes Up And Running Again

Today’s class make was a 5″ x 7″ canvas and the techniques used will all be applied to a clock canvas that we will be making in the next few weeks.

Below is the canvas that the girls made today.  I applied black paint around the edges of the sample make but the class opted to leave the black paint off.  Some also left off parts of the stencilling.

Inks were only used for the stamping, the rest was all paints and stencils.

Sometimes when you take a class if they change the composition too much then the overall effect starts to go wrong but this time what the girls did completely worked.  Well done everyone.

1

Because I had used the colours pink and cream on the original canvas my colour choice for the demonstrating piece was yellow and peach.

Never ever get to finish my demo in the class because I am too busy teaching but decided to sit and finish the canvas after all had gone home.

As you can see different stamps were used also.

2

Shirl

Wahoo Transferred To The Completed Box

Do you have unfinished projects and you’re unsure where they are going, well meet your sister … that’s me.

My unfinished pile is forever growing and instead of trying to sort them out it’s easier to start another.

Whilst having a Skype session with Dot last week she convinced me to start completing some of these pieces.

Well here is a project, which has been sitting in my craft room for months and months but now transferred to the Completed Box.

To be fair all the crackling, stamping and embellishments were done but the whole thing was black and white.  Colour was all it needed but I couldn’t make up my mind … hence relegation to the unfinished box.

Colours finally used are Quinacridone Violet and Green Gold from the DecoArt range of paints plus black gesso.

1

The above started life as a wooden Christmas wall hanger, bought quite a few in the January sale because I knew they would be easy to alter, see here.

Stamps used are: La Blanche – Clock Collage, and Artistic Outpost – Generation Redux.

Love these close up pics as it details so much of the background.  Also it shows the glossy accents which was used on the inner workings of the clock.

34

Last entry for the Craft Stamper Challenge which is Anything Goes, (only three pieces allowed for each challenge).

Thanks for the kick up the proverbial, Dot – definitely needed it.

Shirl

Contour Change A Page Book

FSC is all about Autumnal Colours this month which the lovely Esther picked as the theme.

I opted not to go for an Autumnal make but just to use the Autumn colours.

Ordered some really fab Seth Apter goodies before I went on my hols and they have been sitting on my desk crying out to be used.

The album below has been made with the Contour Change A Page Die.  What it does is cut out the pages to make an album of your choice.

For the front of the book I used a range of Autumnal colours and inside there are lots of die cut pages, in various types of cardstock, just waiting to be journalled.  Left the rings off to make it easier to take photos.

art-journal

Paint brushes stamps from Anna Griffin, raindrops  Designs By Ryn the quote from PaperArtsy,  and not forgetting Studio 490 Art Journal Basics.

All other background stamps are from Stampin Up called Timeless Textures.

A Tim Holtz stencil, Speckles was used with molding paste just to add a little texture here and there.

Black Versafine ink was used for some of the stamps and paint was used for the rest.

Entering into the Craft Stamper Challenge which is Anything Goes.

I would love it if you hopped on over to see all the DT’s work as they are simply stunning.  Also don’t forget that the winner of this challenge has $20 to choose anything they like from Flonz’s store.

Shirl

Mixed Media Wall Plaque

This plaque started life as reject MDF off cuts given to me by Crafty Friend, she was given them and then shared with me.
Now that’s what I call a friend, what do you think?


13

There have been no Saturday classes over the summer but last week saw the start of them again.

Because of one thing and another Phil was the only person who could make it and she didn’t mind having a one to one, below is what we made.

Slow start to the class because we were nattering, consequently we didn’t get it completed.  Finally finished mine and well chuffed with how it turned out.

0

The Plaque is very dimensional and touchy feely, love it.

Used stamps from Inkylicious, Crafty Individuals, Stampin Up, PaperArtsy and a new one which I just bought by Seth Apter (that’s the frame in the middle).

Apart from the stamping I painted, stencilled, used paper napkins, builders mesh and gauze.

Also found some old twine which I plaited to make the hanger for the plaque.

12569

I am entering this into the Craft Stamper Challenge which is Anything Goes.

2

Shirl

Embrace The Next Chapter In Your Life Amber

We had the most truly amazing news about our granddaughter Amber’s ‘A’ Level results on Thursday and how proud are we????

Amber

She got an amazing … 2 A*s and an A.  How super cool is that???  Couldn’t get any higher sweets – you are a star yourself.

One A* was in Art, no surprise there!!!!  An A* in Graphics Design, again no surprise there as she worked so hard to achieve this.

The real surprise came with an A in English which she worked her socks off for.

Grandma and Grandad are extremely delighted and happy for you sweetheart.

She’s off to Arts University Bournemouth in September and we wish her all the luck in the world in her newest adventure in life.

*****************************************************

Late for the FSC challenge this month because not long back from holiday with Andrew.  Went to Turkey and crafting was not even on the horizon.  So sorry girls.

FSC is resisting this month and it was the lovely Avril who picked the theme for this challenge.

Went for a very old technique where you use wax paper for the resist.  This technique is fabulous as it gives you an embossed effect but with none of the raised area, which means you can stamp without any problems.

Wax Resist

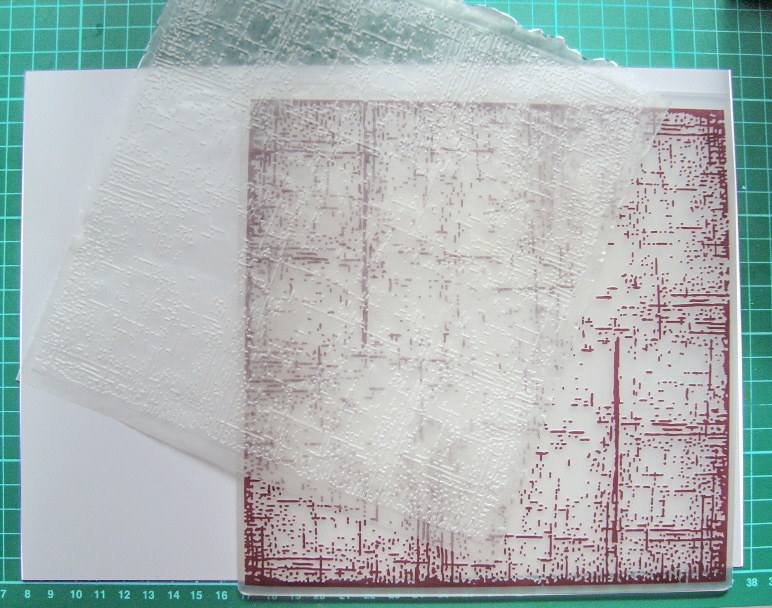
Ran the wax paper through the embossing folder first, then placed the wax paper onto a piece of A4 white card before ironing over the top.  Please put a silicone craft sheet over the paper before you put your heated iron on top.

You could always sandwich the wax paper between two sheets of cardstock (then iron over) this means you would have a negative and a positive of the embossed image.

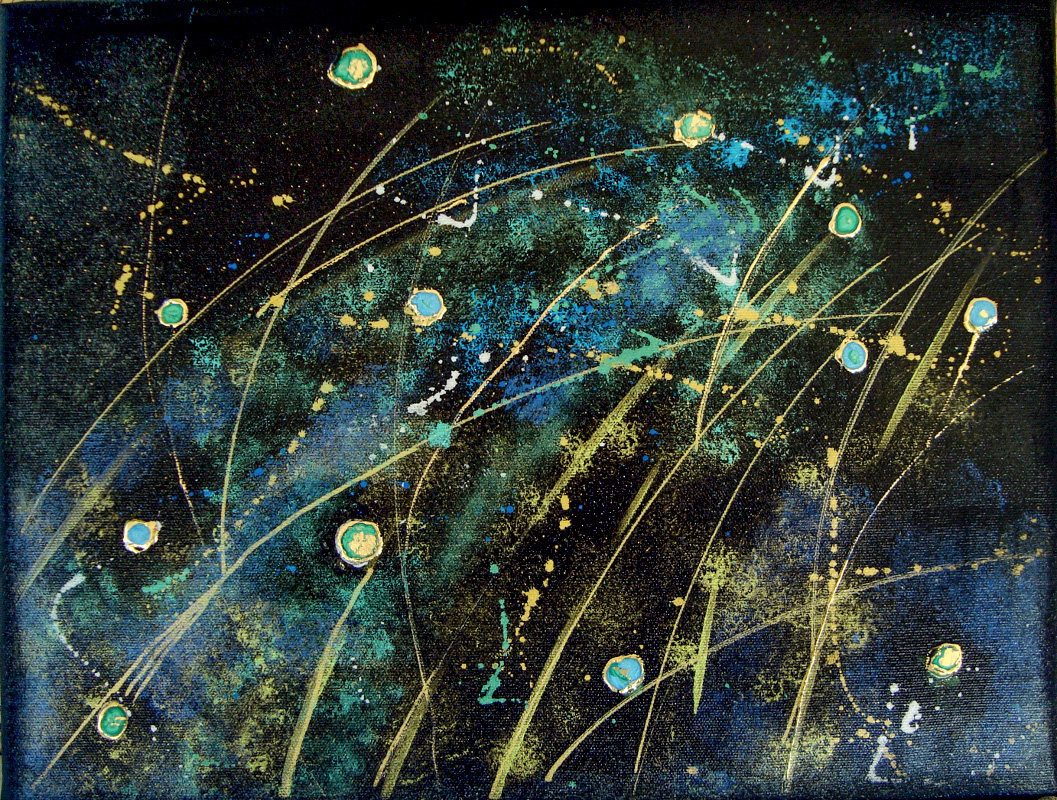
This is how the A4 card looked after I blended DI’s picked raspberry, peacock feathers, spiced marmalade and mowed lawn over the top.

A4 Resist 1

The embossing folder used was an 8″ x 8″ so the ends of the A4 card had no resist wax on it.

When you get to this stage you can do anything with the cardstock … cut into quarters so you have enough to make 4 cards, die cut into tags or you can get at least 10 ATC’s from it.  Watch out for some lovely tags and ATC’s in the future, all using the above cardstock.

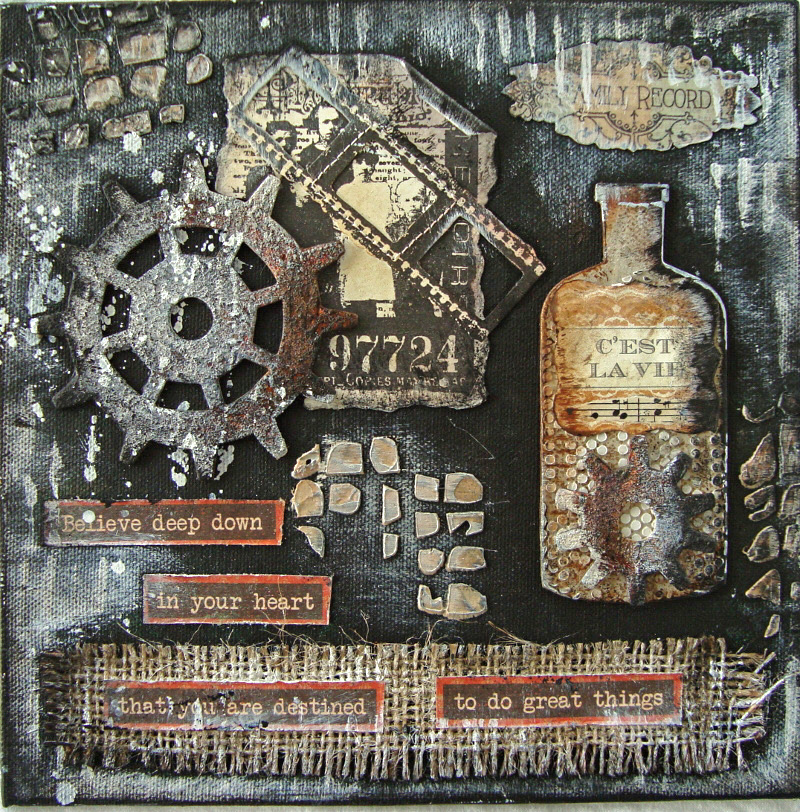
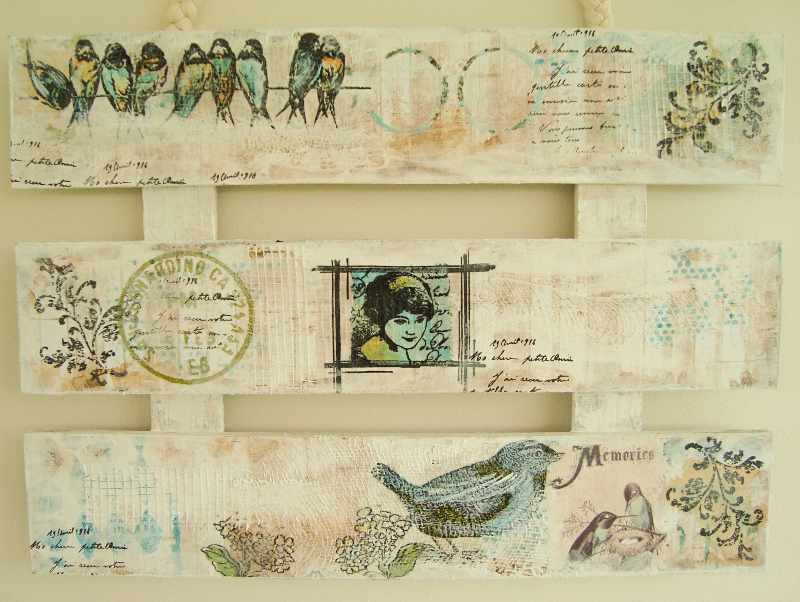
This is my card for the challenge, decided to use a different embossing folder for the background because I wanted to make an 8″ x 8″ card.  Also used different coloured DI’s.

A little bit steam punky and if you click on the image you will be able to see that the embossing folder used is full of clock faces.

Steam Punk

All stamps and inks used are from the Tim Holtz range, the white on the card is acrylic paint and the border of the card is machine stitched with black thread .

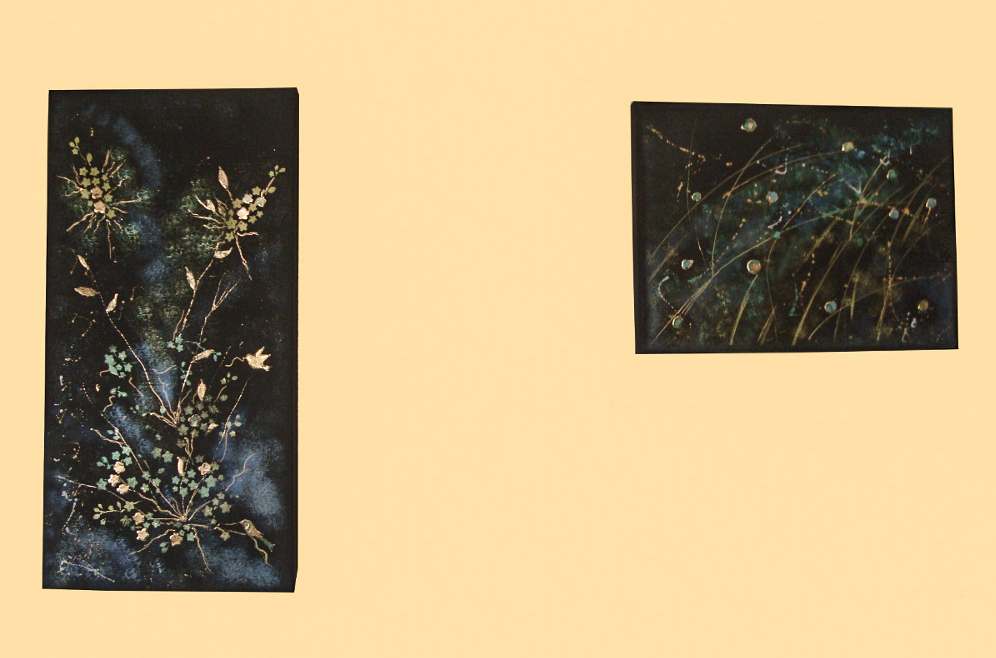
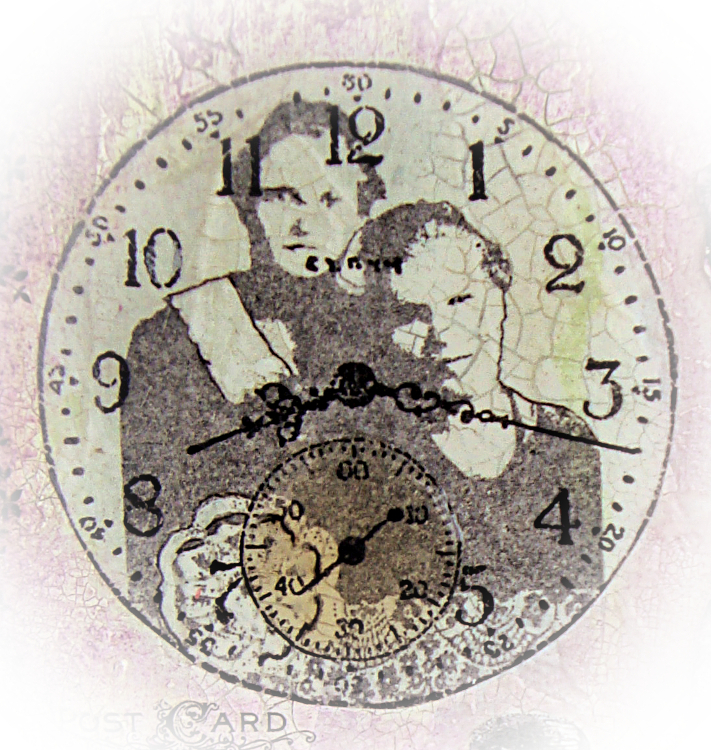
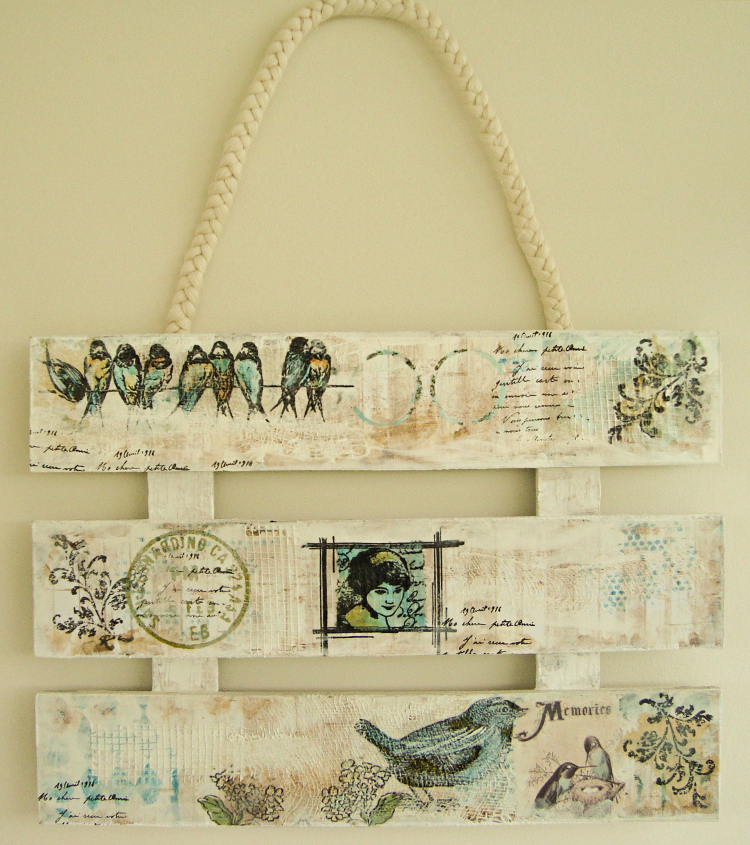
Here is another card which I made a few weeks ago and the background is done using the exact same technique, an embossing folder and wax paper.

I would love it if you hopped on over to see all the DT’s work as they are simply stunning.  Also don’t forget that the winner of this challenge has $20 to choose anything they like from Flonz’s store.

Shirl

Cork, Crafty Friend And Crafting

Finally finished … this canvas was started whilst away in Cork the other week with Crafty Friend.

We spent a whole day crafting which was amazing and I also managed to start another canvas which just needs a bit of tweaking before showing.

1

A few close ups of the collaged piece … which will soon be hanging in my craft room as I love it to bits.

234

Shirl