Log in |

Tarmac Technique

What a day I had yesterday full of fun, laughter and getting messy … definitely messy, with my crafty friend.  Before I go any further I bet you are wondering why I keep referring to her as ‘My Crafty Friend’, simple really, she would rather not have her name mentioned on the web.

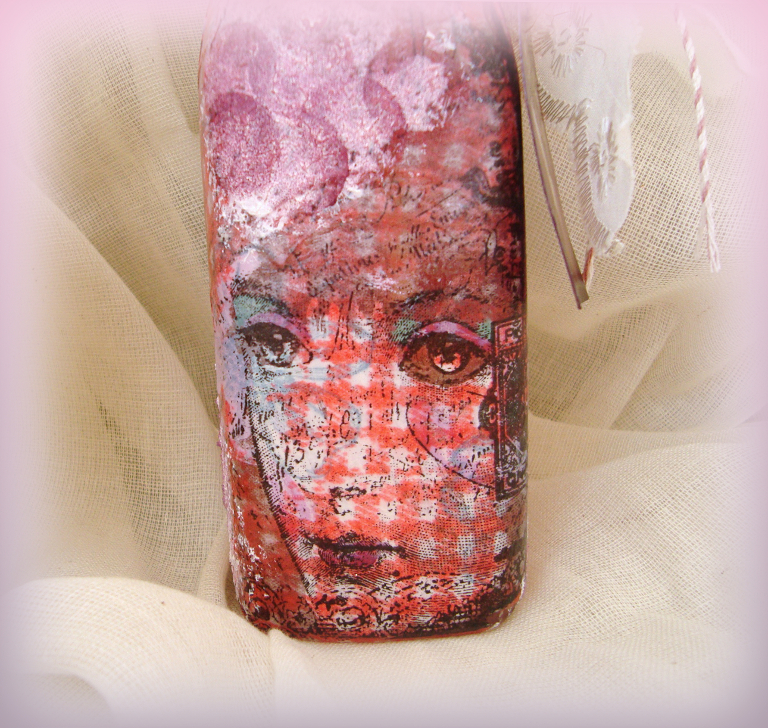
Well the messy part was using Bitumen Paint … TAR … to you and me.  Ali mentioned this technique on C & C and she showed something which she had made, it looked rather cool.  She kindly gave details of where she had seen the technique used.  Off I trots to find out more details which you can find HERE.

Karen says dilute the Bitumen paint to about 50/50 with white spirit but my suggestion is to start with about 80% paint to 20% white spirit and see how you get on.

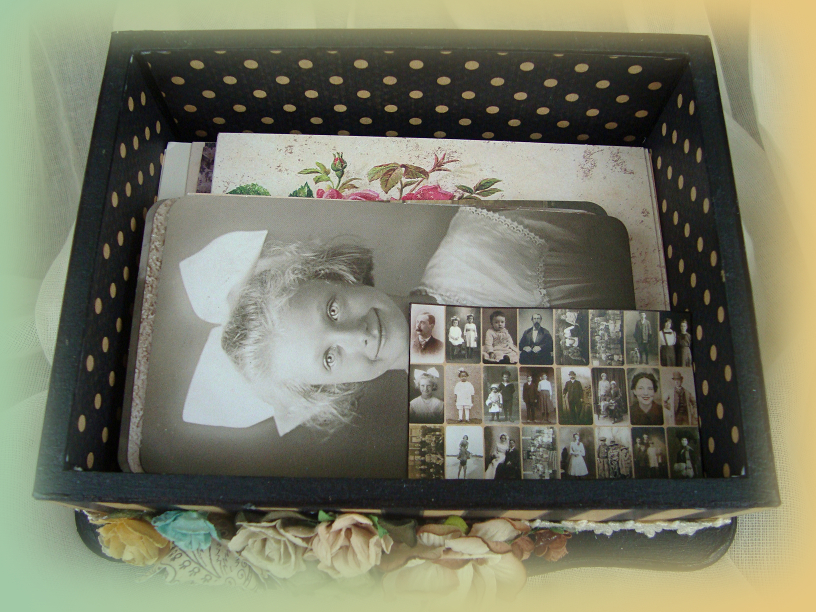
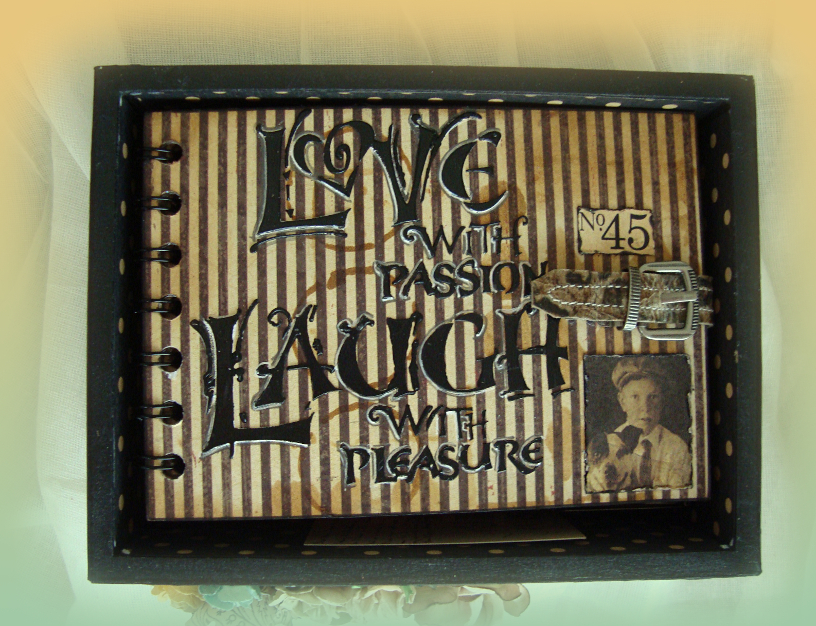
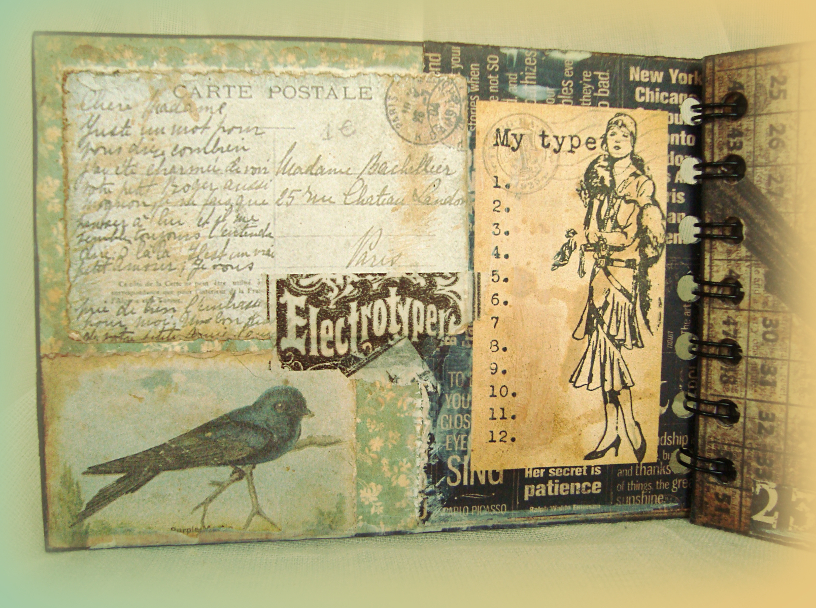
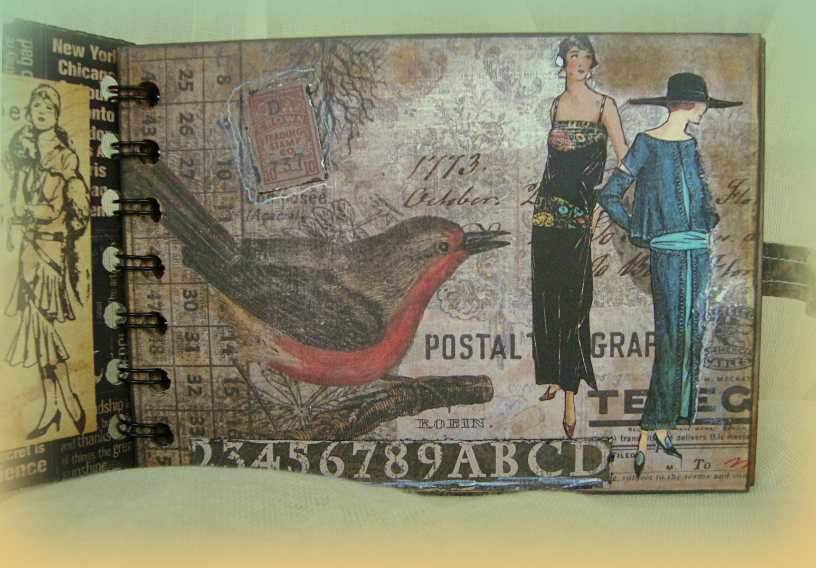
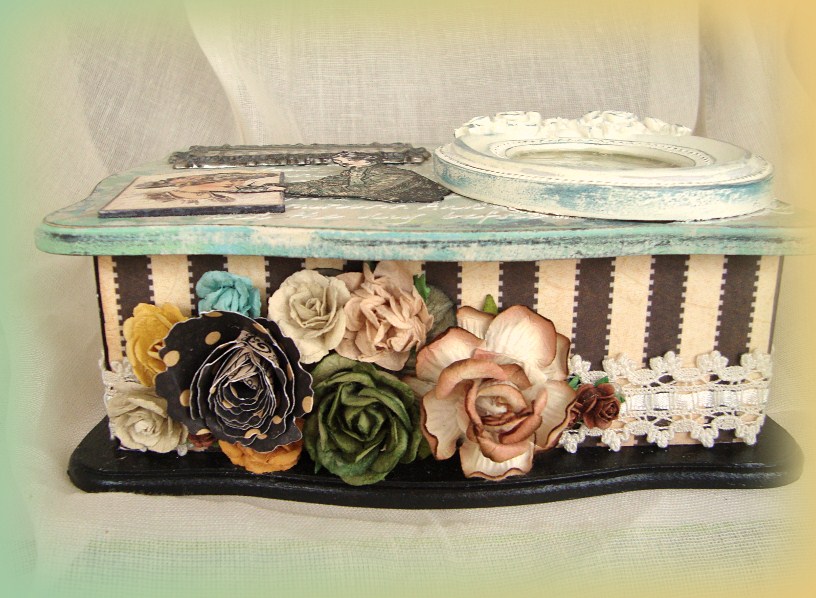
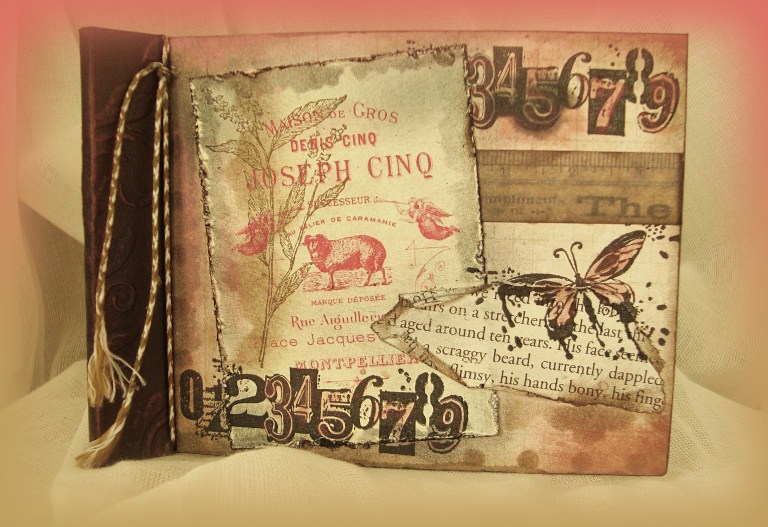
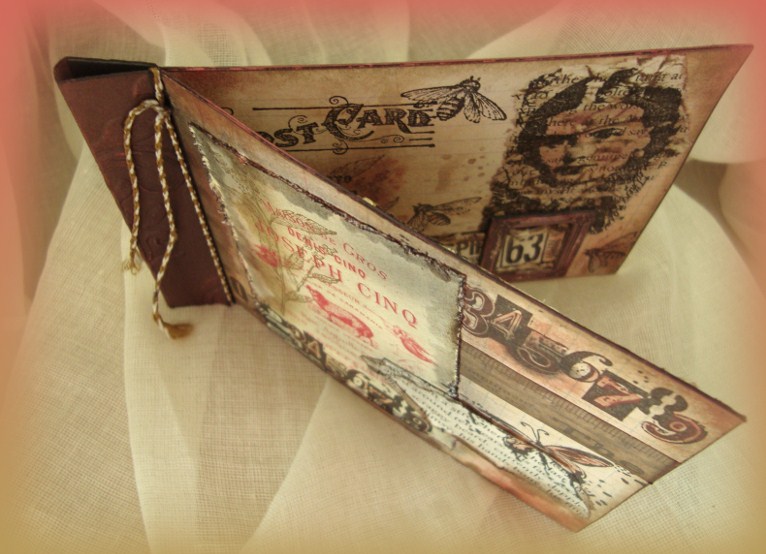
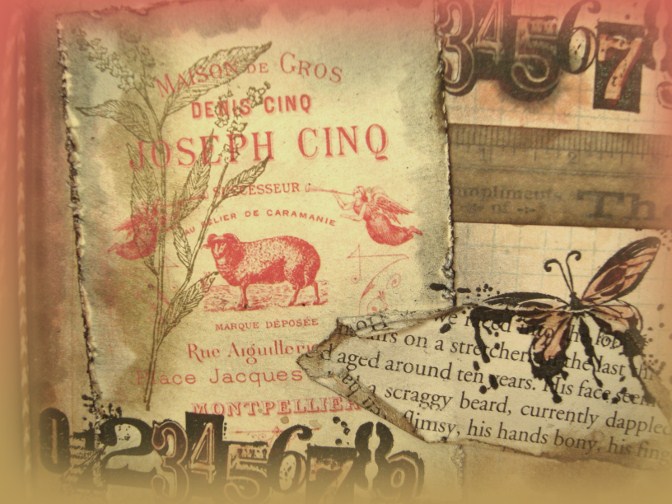
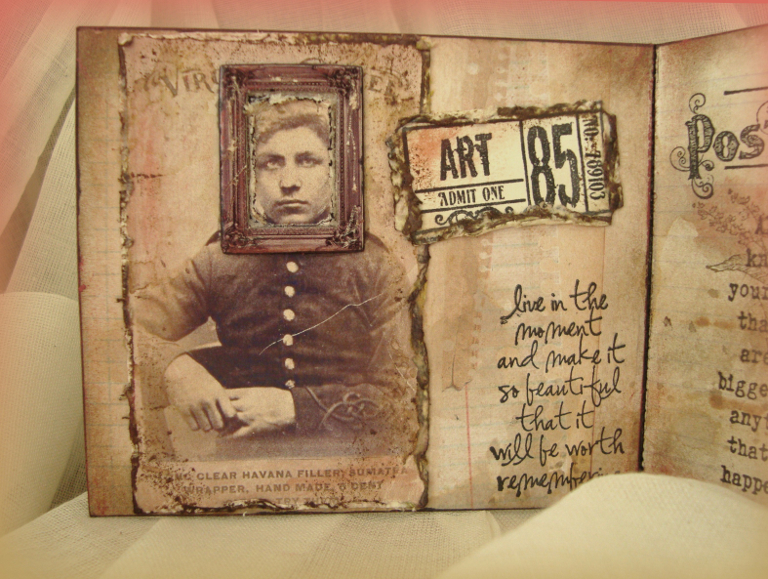
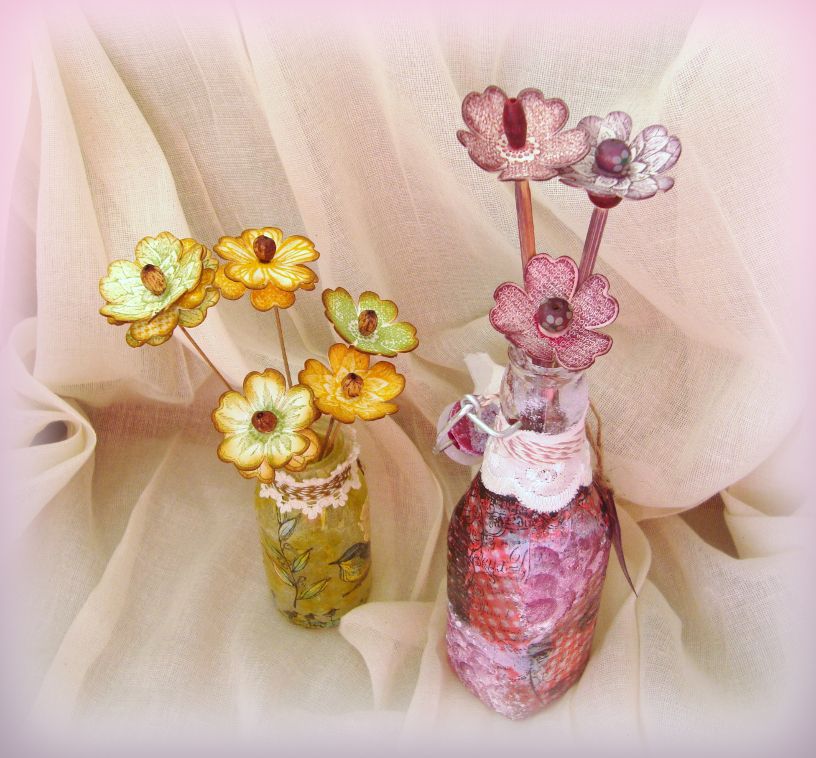
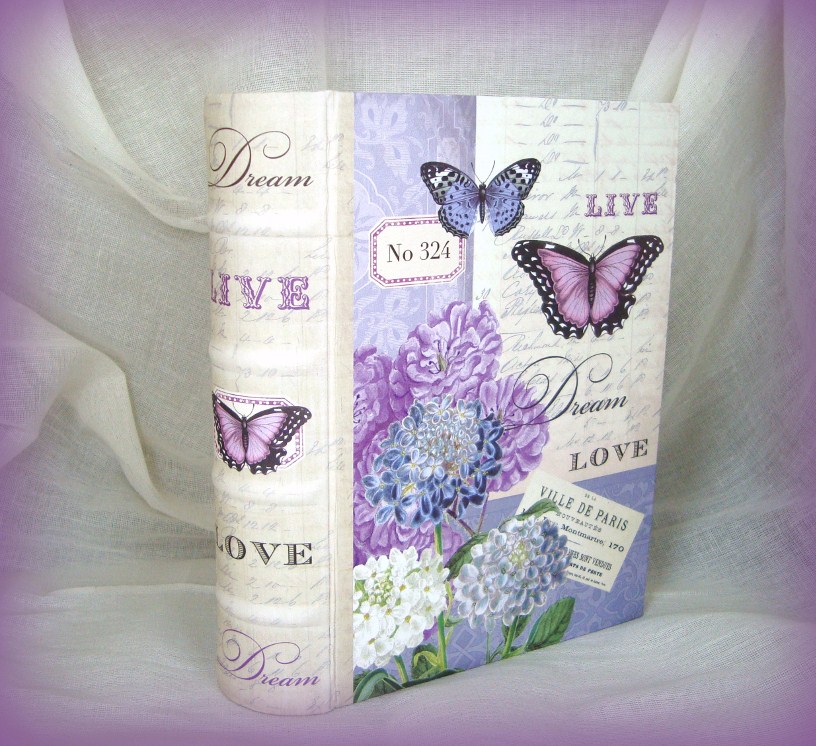
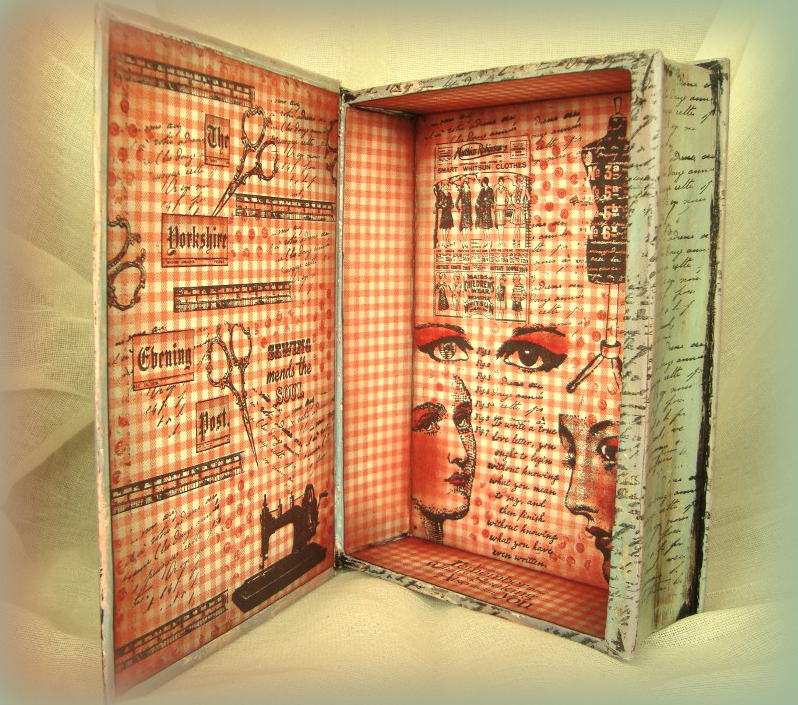
There has to be a before and after so the before is this rather pretty but very bright book box that I had in my stash (bought from Dunnes Stores for €5).  Below is the altered box … love it better now.

89

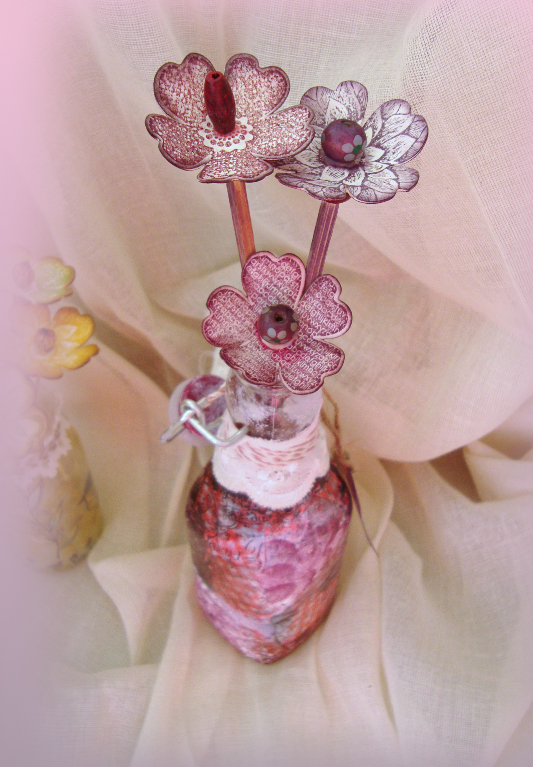
You really should have seen this when it was covered with tar you would have thought I had lost my marbles.

21

4356

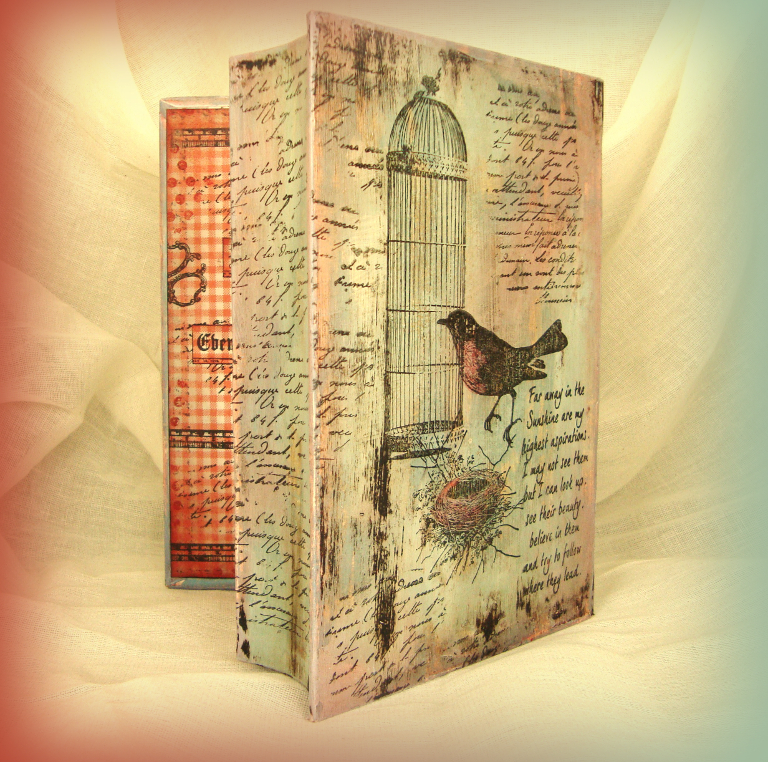
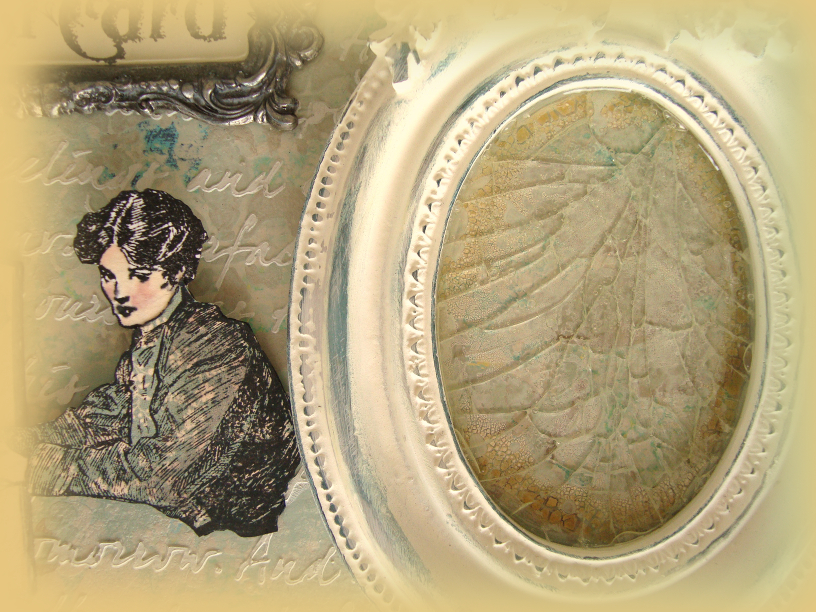
Now isn’t that just the coolest technique.

Shirl

Journaling Book

Before I start something new I decided to show a journalling book that I started last year … the precise date is 14th April 2013.  Impressed that I can remember making it, cheated really, if you look at the first pic you can see that Neil Walker signed the page for me.

Met Neil  the day before at Ally Pally (Saturday, 13th April 2013) and I loved his displayed work so we got talking.  He mentioned he was doing a workshop at The Craft Barn the next day and as it is not far from where my son lives my crafty friend and I went.  At the end of the workshop I asked if he would sign my page.

We covered so many fab techniques including using a credit card with paints, spreading paint with a palette knife, doodling among many others.

54

It helps to sign and date your journaling pages because you can look back and see where the journey started and where it is going.

Also I know that maybe Amber or Lauren will love these books sometime in the future (says she) and to have the date when grandma made it will be a talking point.

Made these two pages, in the same book, on 12th May 2014 (over a year later) with the usual painting, stamping, molding paste, stencilling, paper napkins and inks.  This even has some gold embossing on it.

76

Signed and dated in the bottom left hand corner the next page is the top left hand corner.  Just find a space and away you go!!!

Finished quite a few pages in the book and have taken photos so guess what you will be seeing over the next few days!!!

Shirl

New Home For G45 And Tim

In the end this turned out to be a project that just didn’t stop.
*** Heavy on photos which is so unlike me as you all know I am not a fan of taking them ***

Desperately wanted somewhere to keep my ephemera goodies of Tim’s and also wanted to decorate the box which I bought from the MDF man at Ally Pally in 2012 … yep had it that long.  The goodies fitted perfectly in the box, which you can see here if you want to see the post.  This left a lot of room at the top so next came the album.

Finally cut into the Menagerie paper pad  which wasn’t as bad as I first thought, what is it with me and papers?  I am always the last to show off papers used because I can’t bring myself to show them the scissors.  Used a variety of G45 papers from different pads which was teamed up with Tim’s.

Lots of stamping, fussy cutting, pasting through stencils and painting with pearlised translucent paint leaves me one happy bunny.  Totally love this album so keeping it for myself oh and the box, sorry Amber!!

InsideG45 Album1

See how much space was left even after adding Tim’s ephemera packs so I  designed the album to fit perfectly and to leave room so it comes out easily.

Remember all the rage about faux leather well I have lots made and that’s how I did the strap for the buckle.   Glued two pieces together before cutting to the right size and stitching around for added strength.

Even more photos …

PagesPages1Pages2Pages3

and more …

Pages4Pages5Pages6Pages7

Nearly finished …

Pages8Pages9

PHEWW – THE END
Well the back of the album anyways!!!

Shirl

Summer Blooms

Vintage Stamping Challenges has a Summer Blooms challenge theme this month which was our lovely teamie sister Brenda’s choice.

This started life as a plain MDF box and then went through a complete change with paints, inks, paste, gilding wax, stamps, masks and frames until it passed the Shirl test of me being happy with the end product.

Bought the frame a few weeks back because I thought it would look so pretty with one of the grandkids’ photos in it.  Already had the box lid painted and masked when I pressed the frame onto it just to see how it would look … oops, broke the glass.  Guess who forgot that dimensional paste made an uneven surface.  Don’t you just love happy accidents, the look of the broken glass was amazing and wanted to keep it looking like that.  Very carefully I stuck the frame onto the lid then added a thick layer of glossy accents all over the broken glass.  Tested very gingerly when it was dry to see if I could feel any glass bits .  All was AOK so I sanded bits of the frame in places to add some gilding wax.  Flowers and G45 paper around the edges completes the outside of the box.  Wait until you see what I have made for the inside.

PostcardsPostcards 3Postcards 4

To enter this months challenge just click Mr Linky at the bottom of the VSC web page and maybe it could be you who wins the $20 from Flonz’s store. Please visit the DT’s blogs for more inspiration and also it would be nice to leave them some love.

Shirl

Like Clockwork

 Fashionable Stamping Challenges this fortnight have a terrific theme of  “Like Clockwork” which was picked by our very own Yvonne.

Thank you Alison … Words and Pictures … who chose our fabulous theme from last week

Made a canvas book for my FSC piece this fortnight, decorated the front with loads of clocks and covered two of the pages inside with yet more clocks.

A very easy book to make – just cut two sheets of A4 canvas in half, add a cover and stitch down the middle using a running back stitch.  The cover is corecard run through a clock mask which was then sanded away to reveal the clocks before inking.  With the same mask I added texture paste.

Stitching the middle works better than gluing plus I added a calico like fabric to the inside of the cover … purely for strengthening purposes.  Chose a cream material that was mostly plain but had a very bold flower pattern on it.

Canvas BookCanvas Book1

The little stamped face was placed over a die of an alarm clock and the ornate mantle clock came from a Hero Arts set.

Kept the inside pages almost monochromatic because I am in love with browns and blacks at the moment.

The left hand side is the calico material and the right is the canvas.  Gave the canvas a coat of gesso before I did anything with it but the calico was worked on with nothing added.

Canvas Book2Canvas Book3

This shows the cream calico material on the back cover, how gorgeous is that flower?

I would love it if you hopped on over to see all the DT’s work as they are simply stunning.  Also don’t forget that the winner of this challenge has $20 to choose anything they like from Flonz’s store.

Shirl

Notecard Book

This little notecard book started life as a play around with no particular theme at all.  When completing the inside pages my inspiration came from the First World War.

It is the centenary of the Great War this year which started on 3rd August 1914 with Germany declaring war on France and Belgium.  The following day 4th August, the United Kingdom declared war on Germany.  I am not sure that I could even imagine what the next four years must have been like for all the men, women and children involved.  It finally ended on 11th November 1918

My dad wasn’t even born when the war started he was born the year it ended.

Anyways the image of the soldier used on the notecard reminded me of this photo of my dad in his uniform.  Actually the photo is a postcard so not sure if it is an official army photo which they printed.

At the back of the photo my mum has written “Shortest one is Arthur Raymond House (my dad), Royal Berkshire Regiment while at Brock Barracks, Oxford Road, England”.  I am so glad she wrote that as to be quite honest I would not have known it was him.  I only came across some photos like this when she passed away and lucky for me she had written on the back of a few of them.  How handsome he looks in his uniform.  I have some more photos of my dad whilst in the Korean war (or as sometimes known the “Forgotten War”) which are definitely going into an album which I will then give to my son.

NoteletNotelet2Notelet3

Printed off the image of the soldier on cardstock then framed his face.  Also printed off the image of the relaxing gentleman then painted his coat with the deep red gilding wax.  Also coloured the ladies face with it as well.

Notelet1Notelet4Notelet5Notelet6

Shirl

FSC – Meets Alison

 Fashionable Stamping Challenges this fortnight have a fabulous theme of  “3D” which was picked by our amazing guest this fortnight namely Alison from Words and Pictures.

For my 3D project I have altered two bottles.  Here are the bottles in their naked form and below you can see them all dressed in their finery.  I have also included a pic of the stamped tissue paper which was adhered to the bottle after I had coloured in the stamped images.

BottleAltered1

Here are both bottles with some flowers in … stamped flowers are from Stampin Up.  Added some pretty wooden beads for decoration.

Altered BottleAltered Bottle2Altered Bottle7

All the stamps used on the yellow bottle are from Stampin Up and the pink bottle I have used Inkylicious, darkroom door and Kaisercraft

Altered Bottle5Altered Bottle4Altered Bottle6

I would love it if you hopped on over to see all the DT’s work as they are simply stunning.  Also don’t forget that the winner of this challenge has $20 to choose anything they like from Flonz’s store.

Shirl

Flying Visit

A quick flying visit just to show two samples of what the girls will be making at the class on Saturday.  The finished card doesn’t usually look anything like the samples but it’s fun just having a play to see where everything takes me.

Same colours but used different stamps.  Still working on the end product!!!

Shirl

Ribbon & Bows Meet darkroom door

Vintage Stamping Challenges has a Ribbons & Bows challenge theme this month which was my choice

Used some new products when making this card the first being the little bow which was made from core card with the Sizzix die called Bow-Tied.

The background was made by using the Marina Mist ink pad from Stampin Up with one of my new texture stamps from darkroom door called Plaid.  Added a Stampin Up stamp from the Simply Sketched collection to make the floral border then coloured with Pro Markers.  The image from  Flonzcrafts was also coloured with the same Pro Markers.

  Whilst buying the plaid stamp I added another five background stamps to the order called – Floral, French Script, Harlequin, Dots and Star. which you can find here.

To enter this months challenge just click Mr Linky at the bottom of the VSC web page and maybe it could be you who wins the $20 from Flonz’s store. Please visit the DT’s blogs for more inspiration and also it would be nice to leave them some love.

Shirl

FSC – Circle The Globe Challenge

 Fashionable Stamping Challenges this fortnight have a fabulous theme of  “Circle The Globe” which was picked by … ta daaaa … me.

Bought this beautiful World Map from Stampin Up and so wanted to make something with it so I chose the theme above.  I also thought that maybe some of you didn’t have any map stamps so added that you just have to use a circle in your make.  Also wanted to use the Dina Wakley “All The Gals” stamps plus  a stamp from B Line Designs called Rebecca.

My Pro Markers finally made an appearance after being neglected for yonks and yonks.  Not sure why I don’t use them so much nowadays as colouring in is so therapeutic.  Time just floats away and you forget everything except what you are colouring.

Around The World

After making the background with Dylusions ink spray – Crushed Grape, Adirondack Colour Wash – Lettuce and various masks I added two stamped quotes just to tie everything together.

I would love it if you hopped on over to see all the DT’s work as they are simply stunning.  Also don’t forget that the winner of this challenge has $20 to choose anything they like from Flonz’s store.

Shirl